.jpg)
A plug-in is software that can expand or add new applications (functions) to the camera. The RICOH THETA V, RICOH THETA Z1, and RICOH THETA X use an Android-based OS (Operating System), so a variety of new functions can be added to the camera via plug-ins just like installing apps on your smartphone.
“Route Shooting BETA” and “Outside-in Shooting BETA”, which were released on October 13, 2022, are plug-ins* that provide a new video experience in 360° that differs from conventional playback methods. This article introduces the function features and operation method in detail for these two plug-ins.
* Only RICOH THETA X is a supported model as of March 2023.
First, “Route Shooting BETA” can create a hyperlapse video (a time-lapse video with added motion) that displays the route that was shot.
Next, “Outside-in Shooting BETA” can create a 360° still image that enables you to view all around the periphery of a subject.
Both of these plug-ins use “Visual SLAM” technology to estimate the position information of the camera from video data obtained from the camera.
Many people generally think of position information as GNSS (GPS in Japan), a positioning system that uses satellites. The advantage of “Visual SLAM” is that it can estimate its own position without acquiring position information from a satellite, which means it takes less time than GNSS.
Let’s take a look in detail at each function and how to use them.
1. Introducing the plug-in “Route Shooting BETA”
2. Introducing the plug-in “Outside-in Shooting BETA”
3. About “Route conversion (β)” and “Outside-in conversion (β)” using the basic app for computer
4. Summary
1.Introducing the plug-in “Route Shooting BETA”
“Route Shooting BETA” can create a hyperlapse video that displays the route that was shot.
During playback, not only can you view a hyperlapse video from the starting point to the goal point, you can also playback in reverse from the goal point to the starting point. You can also move to any position along the route.
This plug-in can be put to practical use for on-site surveying at construction sites and similar locations, as well as shooting video at event venues.
[Operation method]
- Startup
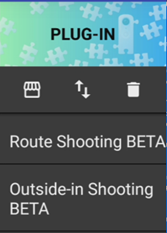
Swipe left on the shooting screen of the camera to display the plug-in selection screen, and then tap “Route Shooting BETA”.
- Making shooting settings
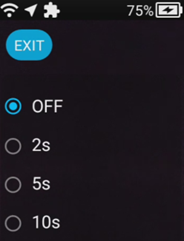
• Tap the self-timer button to select the countdown time between “OFF”, “2 seconds”, “5 seconds”, and “10 seconds”.
• The video size is fixed at “4K (3840×1920), 15 fps”.
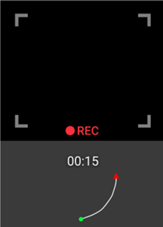
- Shooting
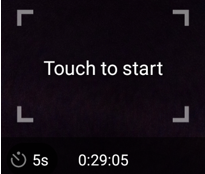
Press the shutter button or tap the frame near the center of the screen to begin shooting.
Once shooting begins, start to move by walking with the camera.
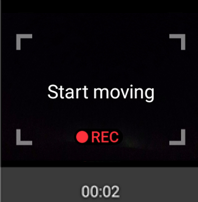
The camera recognizes the position from images so ensure that distinctive features in the surroundings continue to be captured in the video when moving.
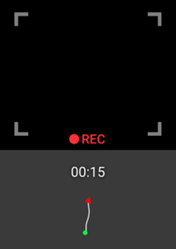
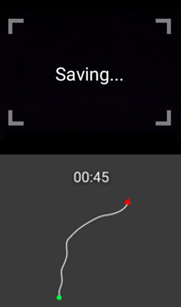
Press the shutter button or tap the frame near the center of the screen again to end shooting.
Tutorial video
https://youtube.com/shorts/e_R2LsoUrhY
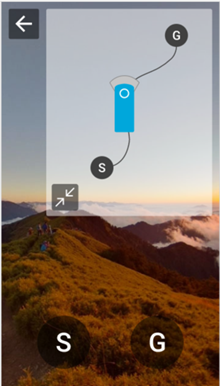
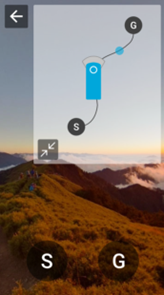
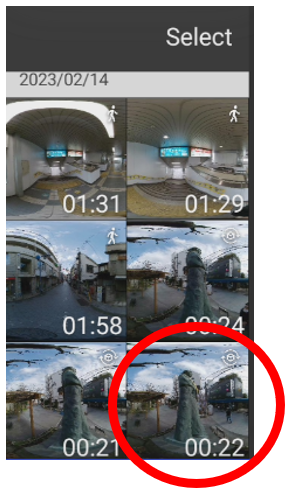
- Playback
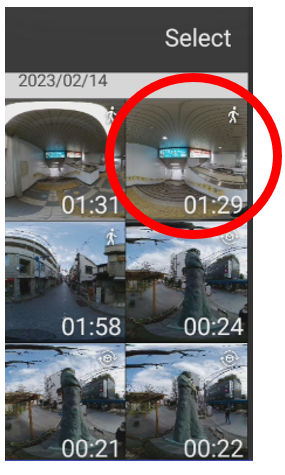
Tap the thumbnail that is displayed after shooting, or exit the plug-in and tap the view button in the single view at the playback screen.
The movement route display, which is displayed during playback, can also be hidden by tapping the zoom-out button.
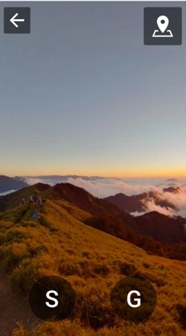
Tap the “G” button to move the view to the shooting end point and the “S” button to move the view to the shooting start point. Tap the screen while the view is moving to stop it moving.
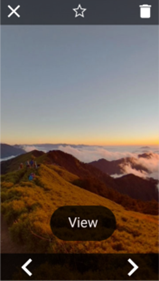
Sample image taken with “Route Shooting BETA”
2.Introducing the plug-in “Outside-in Shooting BETA”
“Outside-in Shooting BETA” can create a 360° still image that enables you to view all around the periphery of a subject.
When shooting a video with THETA around a subject, THETA can automatically detect the subject and create a 360° still image that allows the user to rotate the subject by swiping left and right.
[Operation method]
- Startup
Swipe left on the shooting screen of the camera to display the plug-in selection screen, and then tap “Outside-in Shooting BETA”.
- Making shooting settings
• Tap the self-timer button to select the countdown time between “OFF”, “2 seconds”, “5 seconds”, and “10 seconds”.
• The video size is fixed at “2K(1920×960), 30 fps”.
- Shooting
Press the shutter button or tap the frame near the center of the screen to begin shooting.
Once shooting begins, start to move by walking around the object you want to shoot.
The camera recognizes the position from images so ensure that distinctive features in the surroundings continue to be captured in the video when moving.
After walking around the object one time, press the shutter button or tap the frame near the center of the screen again to end shooting.
Tutorial video
https://youtube.com/shorts/MJtzA9VsS2c
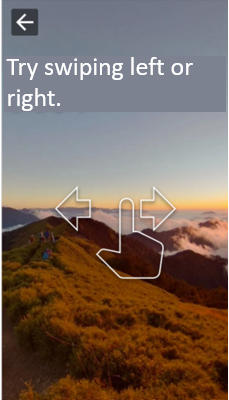
- Playback
Tap the thumbnail that is displayed after shooting, or exit the plug-in and tap the view button in the single view at the playback screen.
Swipe left or right in the single view to move the view.
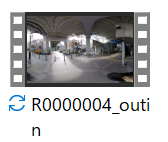
Sample image taken with “Outside-in Shooting BETA”
3.About “Route conversion (β)” and “Outside-in conversion (β)” using the basic app for computer
So far we have introduced how to create an image using plug-ins for RICOH THETA X. However, it is now possible to create a similar image from a video shot with other camera models by using the conversion function in the basic app for computer (version 3.18.0 or later).
■Route conversion (β)
For a video shot while moving, you can display the route you moved, and view it like a hyperlapse video up to the selected point.
[Operation method] (The following screen is an example for Windows.)
• Start the basic app for computer “RICOH THETA”.
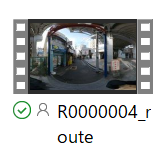
• Drag and drop the 360° video shot with RICOH THETA.
• Select [Tool] → [Route conversion (β)].
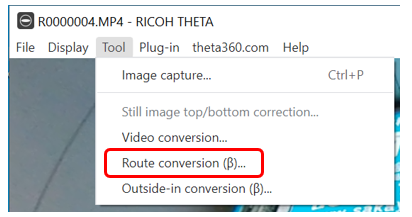
• The video will be converted. Viewing this video with the basic app for computer “RICOH THETA” will enable you to playback a route image.
■Outside-in conversion (β)
For a video shot while walking around the subject, you can view the subject from various directions like a frame-by-framevideo.
* Video files(excluding 1280×720 size video) shot with RICOH THETA (all models) are supported. Videos may not be converted depending on the shooting environment and conditions.
[Operation method] (The following screen is an example for Windows.)
• Start the basic app for computer “RICOH THETA”.
• Drag and drop the 360° video shot with RICOH THETA.
• Select [Tool] → [Outside-in conversion (β)].
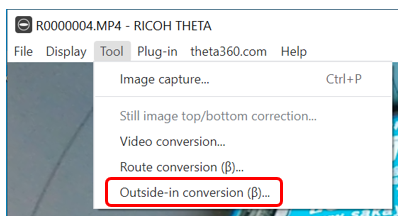
• The video will be converted. Viewing this video with the basic app for computer “RICOH THETA” will enable you to playback an outside-in image.
4.Summary
We have introduced the plug-ins “Route Shooting BETA” and “Outside-in Shooting BETA” together with “Route conversion (β)” and “Outside-in conversion (β)” using the basic app for computer.
These functions can be used somewhere between still images and videos.
They are useful when you want to shoot only a route (or trajectory) or only the periphery of a subject because it cannot be shown properly in a still image and shooting a video is pointless in terms of capacity and handling the remaining data.
Be sure to try these plug-ins!


.svg)