RICOH THETA Z1 is the flagship model of the RICOH THETA series. It features high-definition still image quality with a 1 inch sensor and huge potential with RAW (DNG) shooting.
THETA Z1 now has updated firmware and improved functionality for RAW shooting! Let’s go over the details.
RAW (DNG) shooting update
Previously in the THETA Z1, ‘HDR rendering’, ‘Handheld HDR’, and ‘NR (noise reduction)’ couldn’t be selected when RAW + JPEG mode was set in the THETA app. It was only possible in JPEG mode.
So, we received many requests to add HDR mode to RAW shooting.
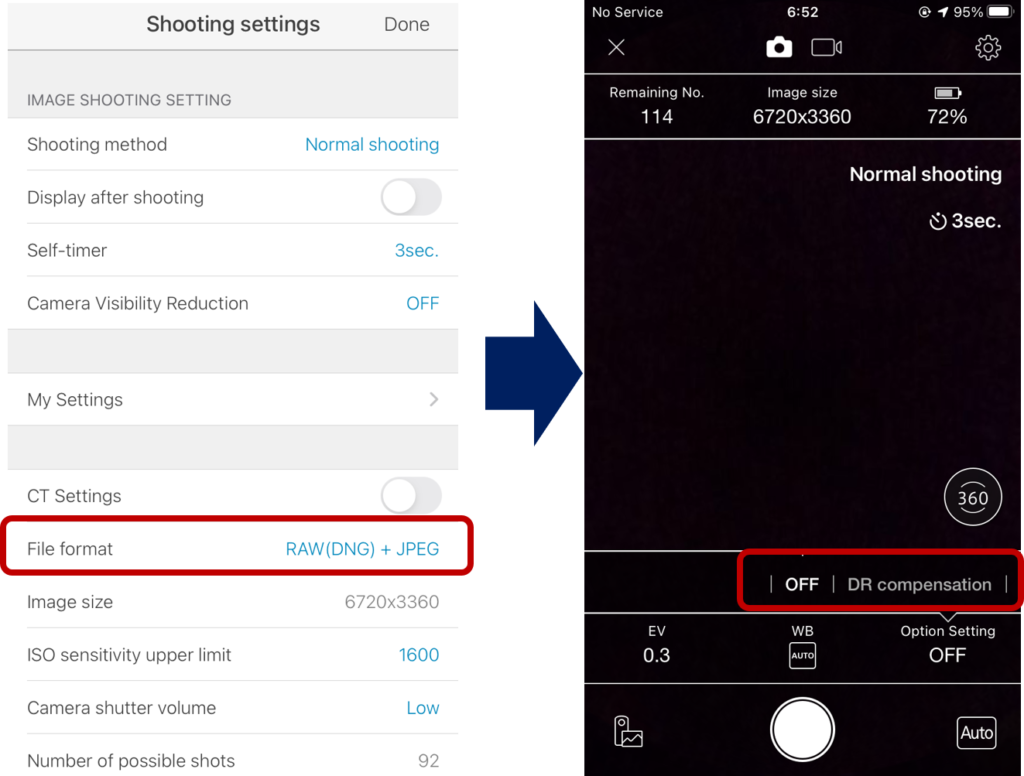
Before the update: Setting screen for RAW (DNG) + JPEG on THETA Z1
After updating the THETA Z1 firmware, the following modes can be selected when using RAW (DNG) + JPEG.
・HDR rendering
・Handheld HDR
・Noise reduction
By selecting these modes under RAW (DNG) + JPEG, a wider range of editing is possible.
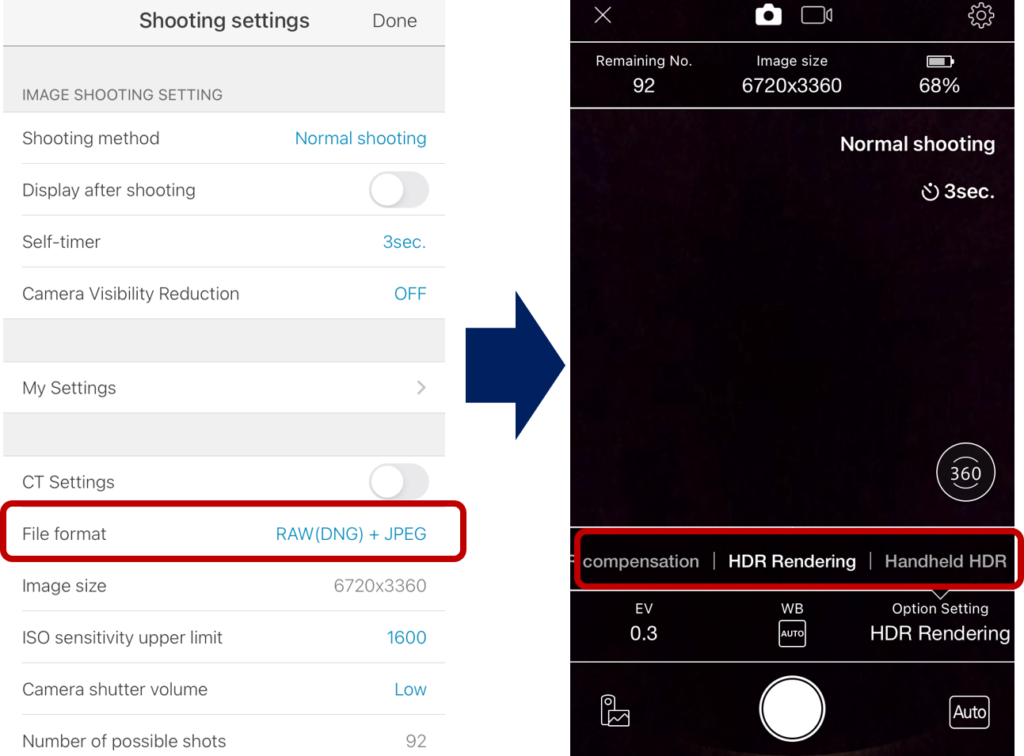
After the update: Setting screen for RAW (DNG) + JPEG on THETA Z1
First, you need to update the Z1’s firmware and the THETA app.
*Click here for step by step instructions on how to upgrade THETA
*Update the THETA app to the latest version from the App Store.
RAW + JPEG in HDR rendering mode
When setting RAW (DNG) + JPEG into ‘HDR rendering’ mode with THETA Z1, multiple bracketed images are combined. The resulting raw image has lower noise and higher dynamic range compared to a normal DNG.
We recommend shooting on a tripod just as you would with normal HDR composite shooting.

You can create a better image with a wider dynamic range even in high contrast situations such as indoor scenes with bright windows.
Shoot and edit with RAW (DNG) + HDR rendering
*The new RAW (DNG) files are 16-bit, meaning the file size has increased from about 50MB to about 60MB.
Shoot with normal HDR rendering (JPEG)
RAW + JPEG in handheld HDR mode
Casually shoot by hand or on a monopod and get more dynamic range in ‘Handheld HDR’ mode without worrying about motion blur. RAW (DNG) and RAW (DNG) + JPEG are both available in this mode.
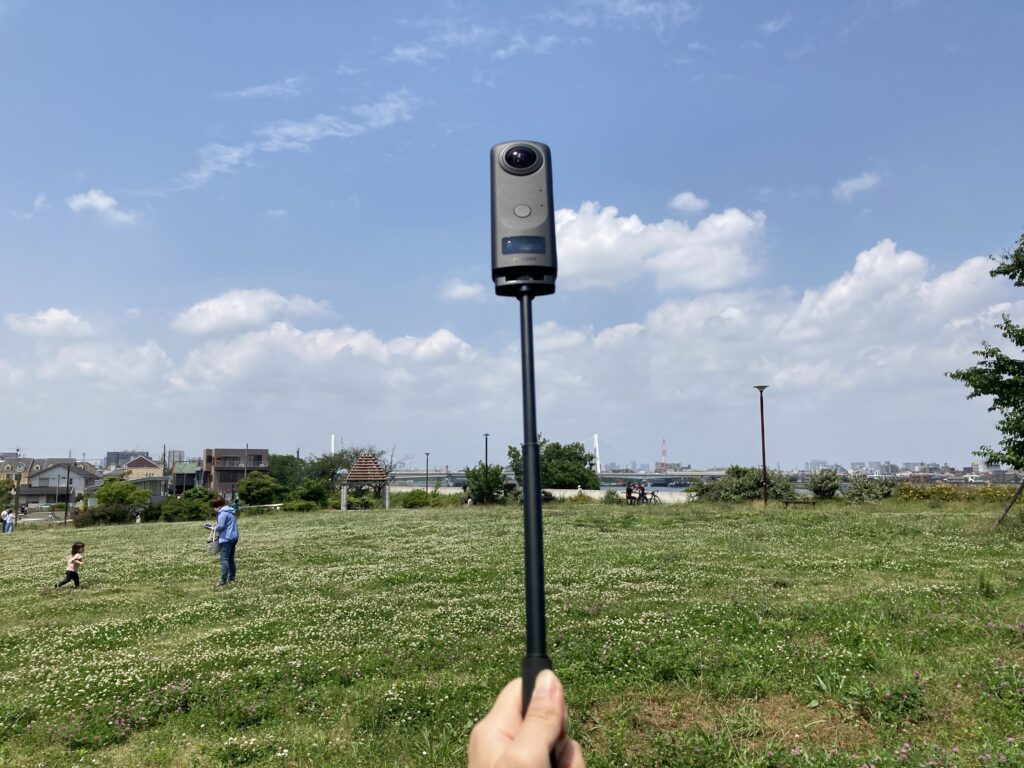
THETA Z1とRICOH THETA Stick TM-3
Of course, to get higher dynamic range or lower noise, we recommend shooting in ‘HDR rendering’ mode with THETA on a tripod, however, ‘Handheld HDR’ mode can make it easier to shoot RAW HDR in casual settings.
Shoot and edit with RAW (DNG) + handheld HDR
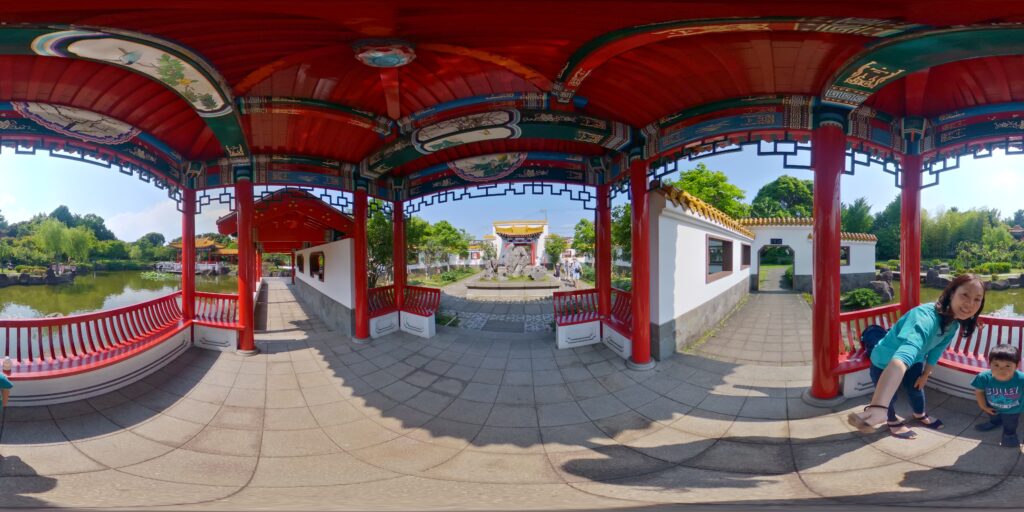
Shoot with normal handheld HDR rendering (JPEG)
RAW + JPEG in Noise Reduction mode
Try selecting ‘NR (noise reduction)’ mode when using RAW (DNG) + JPEG for shooting beautiful night views with THETA Z1.
In this mode the images result in less noise compared to normal RAW (DNG) shooting.
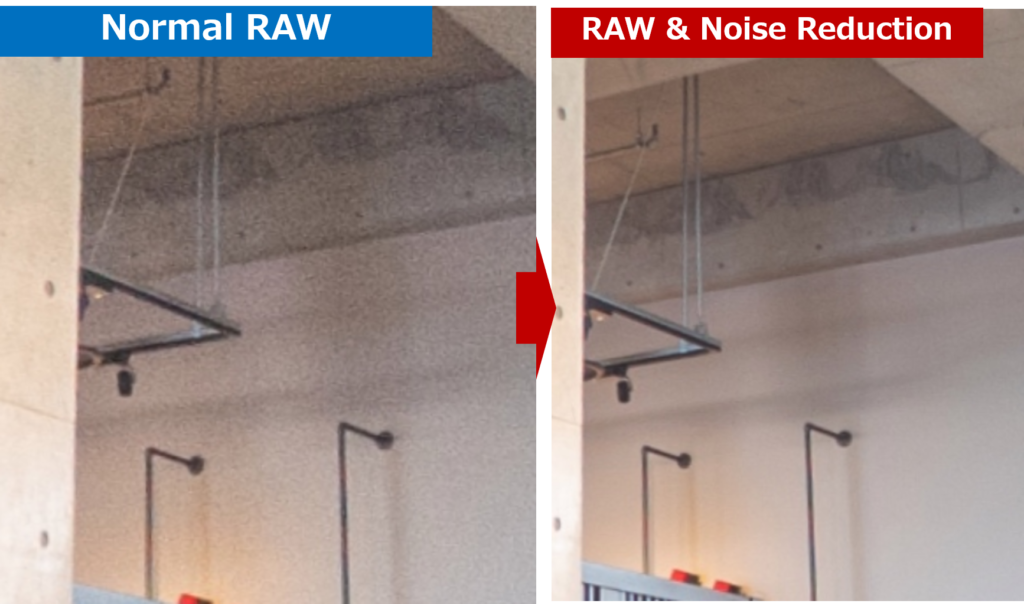
Shoot on a tripod just like when shooting in normal NR.
THETA Z1 reduces noise by combining multiple images, so it will work well for any scene you want to shoot with less noise, above all it’s great for night scenes.
How to view the RAW (DNG) data?
As the name suggests, when shooting in RAW (DNG) + JPEG, two types of data, RAW (DNG) data and JPEG data, are recorded.
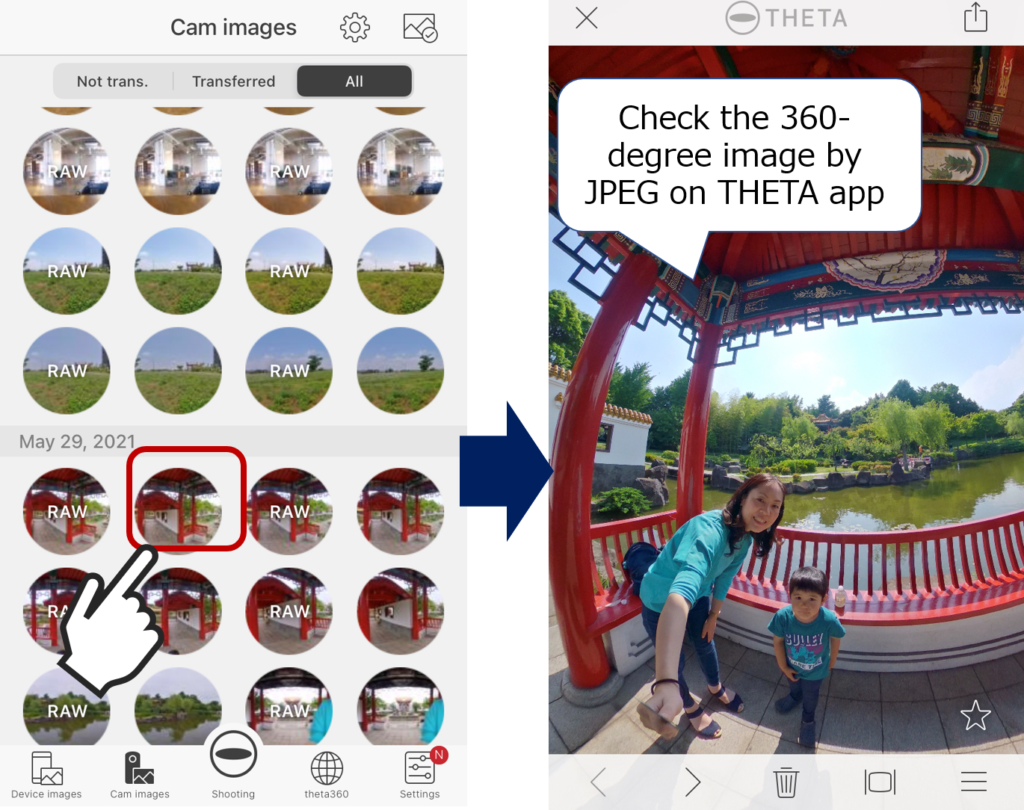
Check the 360-degree image on THETA app
However, RAW data cannot be downloaded directly to your smartphone, only to a PC. If you want to check the 360-degree image on your phone, download the JPEG image to the THETA app to view it.
How to edit a RAW 360 degree image?
Let us show you how to edit the RAW data on your PC using Adobe Lightroom Classic!

First edit the images with Lightroom Classic, and then stitch them with RICOH THETA Stitcher, which is a dedicated plug-in for Lightroom Classic which can create 360-degree images.
When using RICOH THETA Stitcher, options such as Zenith correction, Front position adjustment, and Camera Visibility Reduction ON / OFF are available.
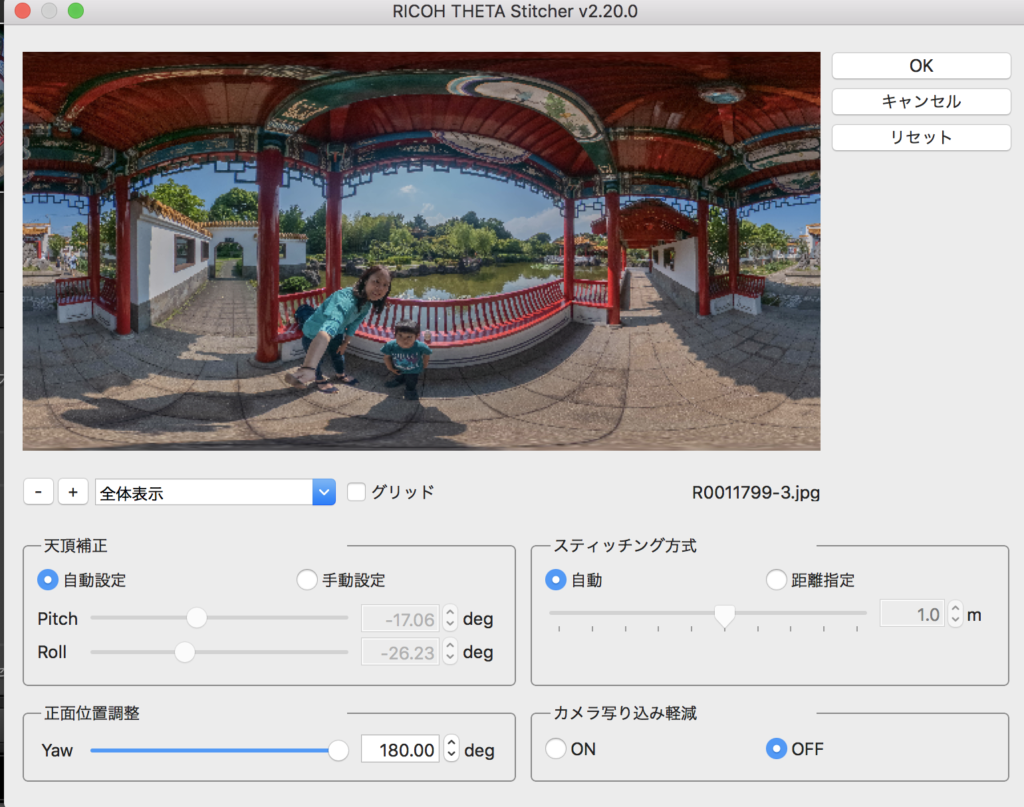
Click here to download RICOH THETA Stitcher
Click here for instructions on how to use RICOH THETA Stitcher
More detail on YouTube.
RICOH THETA Z1 gives you many ways to enjoy both business and daily life. Play around with its updated new functions!


.jpg)


.svg)


