RICOH THETA Z1 is the flagship THETA model equipped with a large 1-inch sensor. It creates high-definition 360-degree photographs. Shooting in JPEG produces great image quality, but by shooting in RAW (DNG) + JPEG, you can adjust the image quality as you would with any other camera capable of shooting in RAW, such as a DSLR.
Photo-enthusiasts and casual shooters alike can make the most out of RAW shooting with THETA Z1 because it allows for the creation of a more true image that can be used to capture one’s memories as well as for commercial applications like virtual tours.
After RAW images taken with a THETA Z1 are developed with Adobe Lightroom Classic, a free dedicated plugin called ‘RICOH THETA Stitcher’ is required to stitch the dual fisheye data into 360 degrees images.
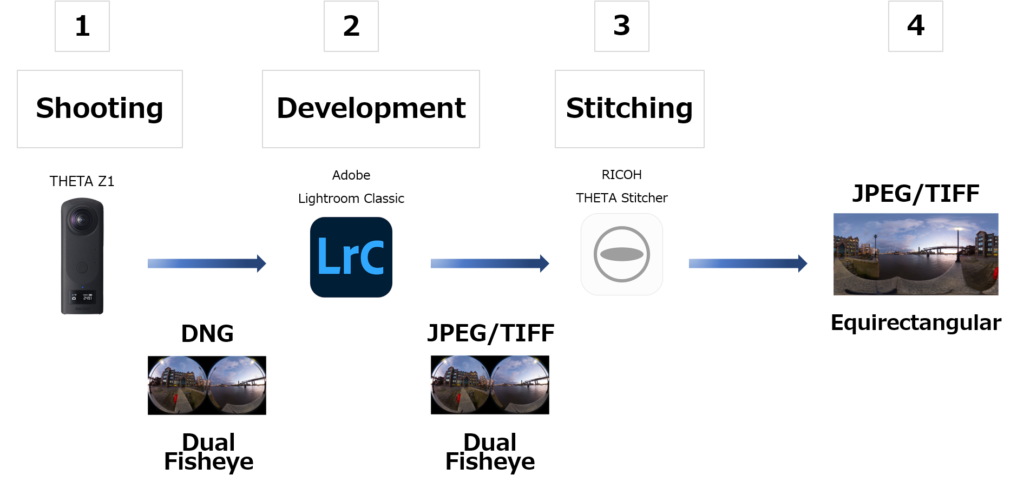
It sounds difficult, but once you set it up, it’s very easy!
Here are some steps with tips for developing in Adobe Lightroom Classic.
Photo by Sam Rohn
Start shooting RAW (DNG) with THETA Z1!
Shooting:
Connect THETA Z1 and the THETA app on your smartphone and set it to RAW (DNG) + JPEG mode. For this article, we set the combination of RAW (DNG) + JPEG mode and HDR, which are newly supported by the latest version of THETA Z1.
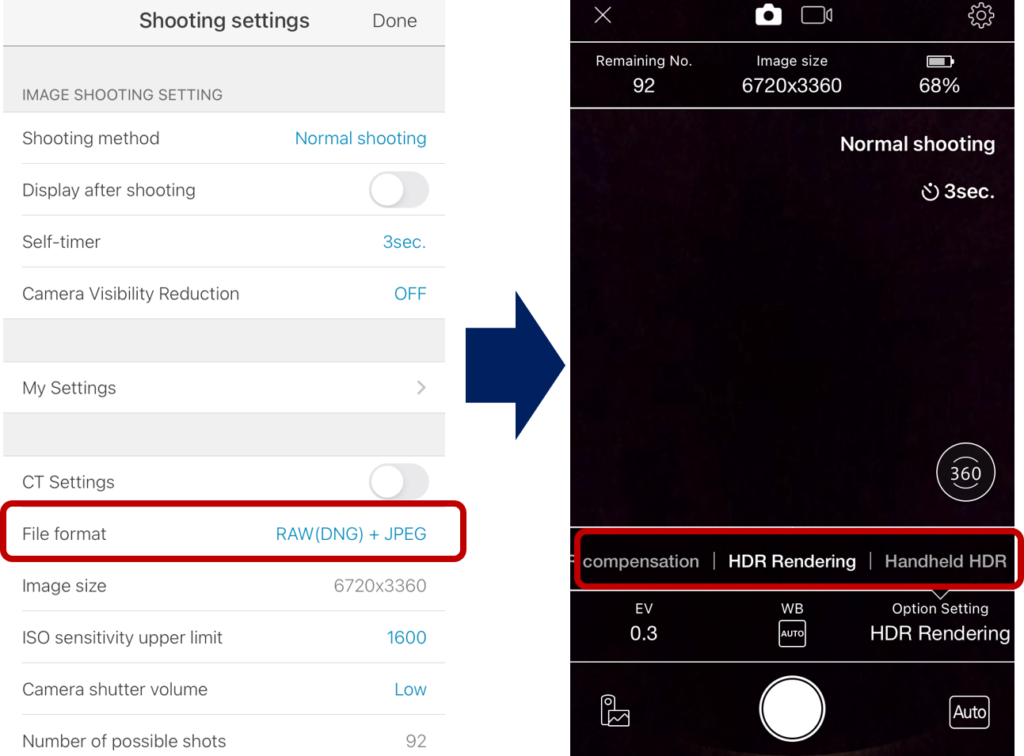
THETA app setting screen on your smartphone
*Shooting in HDR requires a tripod. If you don’t use a tripod, RAW (DNG) + JPEG mode plus handheld HDR is recommended.
*Click here for details on the new version of Z1 RAW functionality.
RAW (DNG) + JPEG mode can shoot both RAW and JPEG photos at the same time. You can transfer the JPEGs to the THETA app on your smartphone and review the images, but you cannot do so for RAW photos. They must be imported and viewed on a PC.
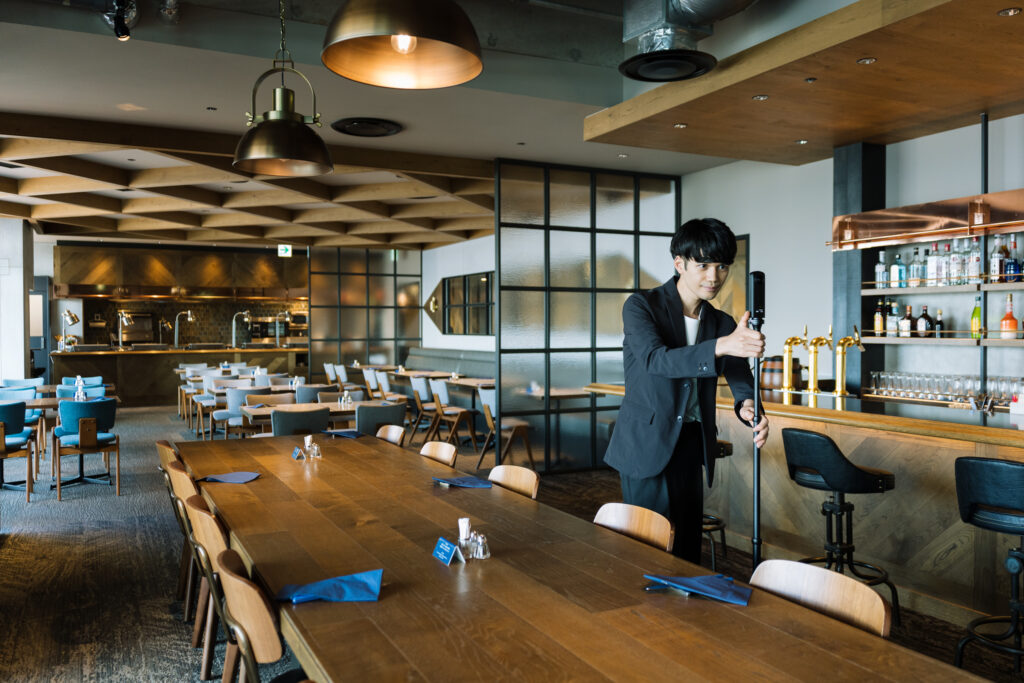
Importing RAW (DNG) data on a PC:
Connect THETA Z1 to your PC with a USB cable and transfer the RAW (DNG) files. THETA Z1 RAW (DNG) data is recorded in dual fisheye format.
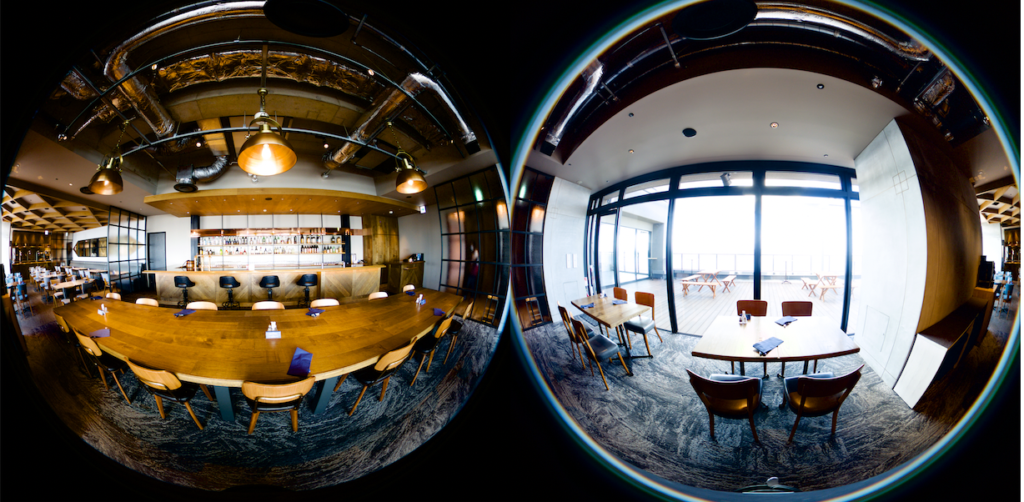
RAW (DNG) photo taken with THETA Z1
On a Windows PC when you connect THETA via a USB cable, you can see the connection, and a “THETA Z1” folder is displayed in Explorer. On a Mac, however, nothing shows up on the display, so you need to search for the THETA Z1 folder in “Image Capture” or directly on Adobe Lightroom Classic.
Develop with Adobe Lightroom Classic!
Develop RAW (DNG) photos shot with THETA Z1 in Lightroom Classic.
Of course, you can edit the RAW photos as you like, but these are our recommended settings for beginners at editing THETA Z1 images. We also include screenshots!
After development, you need the free plugin ‘RICOH THETA Stitcher’ for Lightroom Classic to synthesize the 360-degree images.

Developing:
Starting on the developing screen in Lightroom Classic, we adjust the highlights to -100 and the shadows to +50. You can save a preset suitable for Z1, and then you only need small adjustments depending on each individual image.
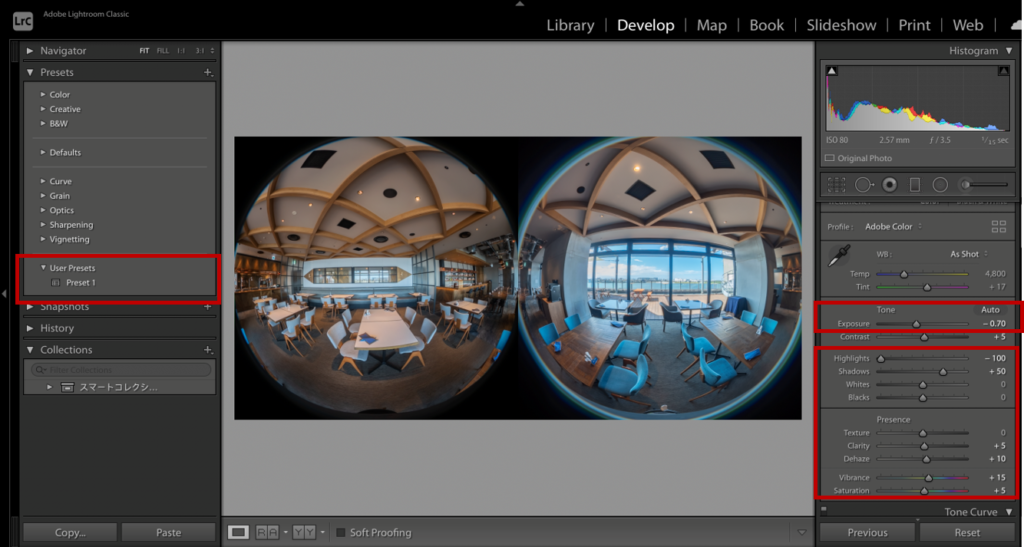
In the photo above, we have set all the values in the red frame in our preset, with exposure set 0. Depending on the image, you can just adjust the exposure and tweak the other values.
Example of the preset:
Exposure 0
Highlights -100
Shadows +50
Clarity +5
Dehaze +10
Vibrance +15
Saturation +5
Be sure to check ‘Lens Correction’ and then ‘Remove chromatic aberration’. This will eliminate the color fringing that tends to occur on high contrast edges.
If you don’t like the purple fringe that tends to appear near windows, try to adjust ‘Purple Amount’ under ‘Defringe’ in the Optics Panel.

That’s it for editing!
Create 360-degree images with RICOH THETA Stitcher!
After editing with Lightroom Classic, export the photo as a dual fisheye JPEG / TIFF file, which can be stitched with ‘RICOH THETA Stitcher’ installed in Lightroom Classic.
You can create beautiful 360-degree images in equirectangular format, just as you can with a JPEG photo straight from THETA Z1 body by using the Stitcher.
First of all, download RICOH THETA Stitcher from the official THETA website.
Follow the steps in the link below to launch RICOH THETA Stitcher in Adobe Lightroom Classic.
Click here for instructions on how to use RICOH THETA Stitcher
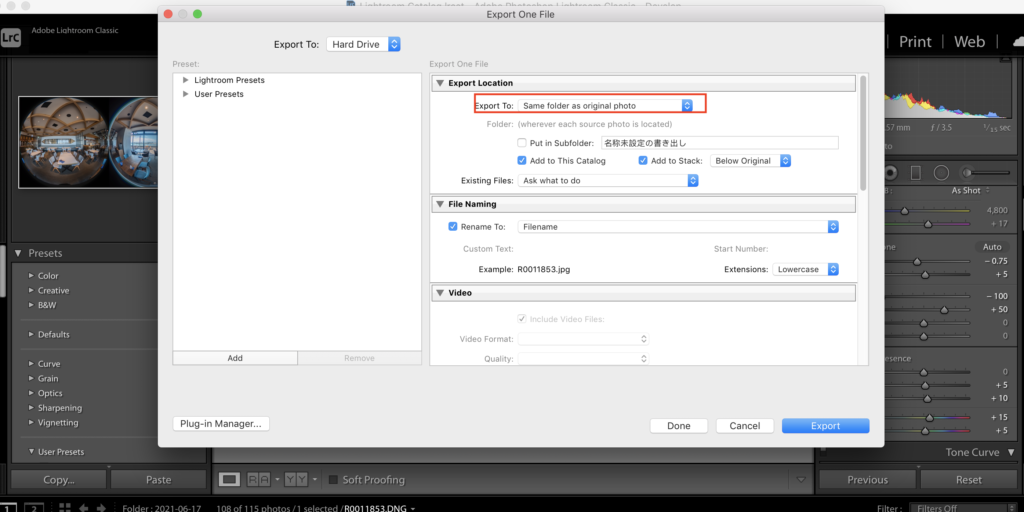
Then, open the RICOH THETA Stitcher plugin in Lightroom Classic by selecting ‘File’ and ‘Export.’ With the plugin, it’s possible to adjust the center position, and to stitch many images by batch processing when you select multiple RAW (DNG) files, as well as other options.
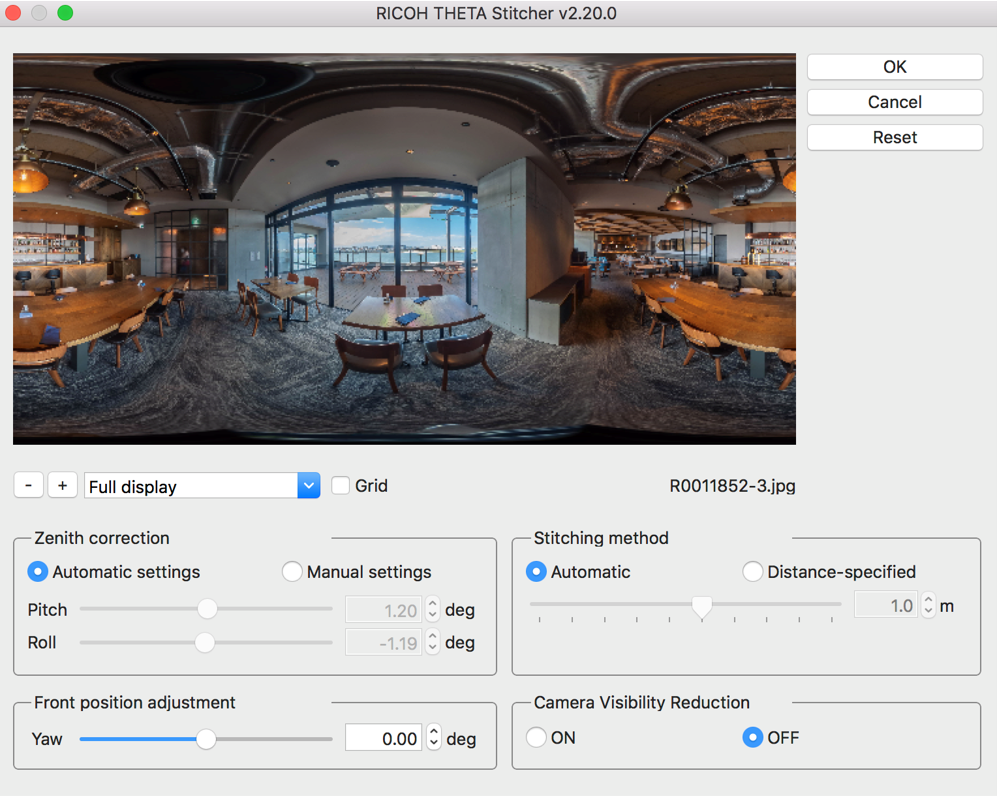
RICOH THETA Stitcher screen
Things to watch out for when using RICOH THETA Stitcher.
Please keep the following points in mind when using RICOH THETA Stitcher.
Note:
-Use images taken with THETA Z1.
-The file format that can be processed is a dual fisheye JPEG / TIFF file. Only 8-bit or 16-bit TIFFs are supported.
-The maximum resolution that can be processed is 7296 x 3648. If you use ‘HDR Join’ in Adobe Lightroom Classic, uncheck ‘Auto Align.’
-We recommend keeping the JPEG / TIFF files in the same folder as the original DNG file, or in a subfolder in the DNG folder.
*Virtual tour with RICOH360 Tours
With the above precautions in mind you will be able to create beautifully stitched 360-degree JPEG images like those processed internally by THETA Z1. However, images taken with cameras other than THETA Z1, or images with different image sizes, are not supported because the stitching process may not be equivalent to THETA Z1.
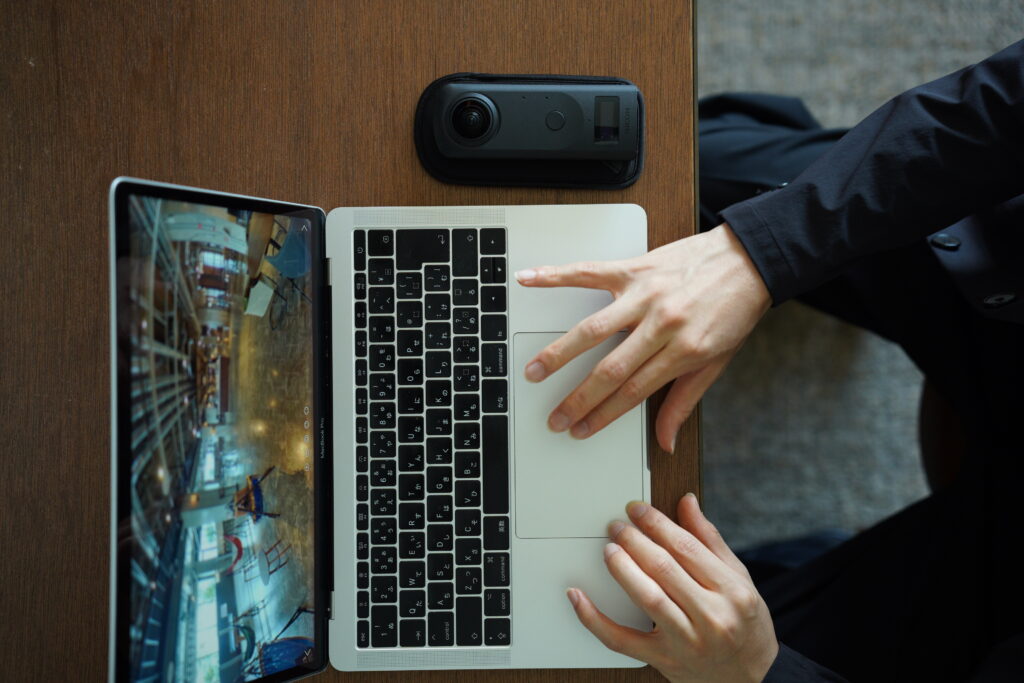
In order to achieve the optimal stitching, THETA lenses are checked and adjusted for each individual THETA Z1 before leaving the factory. The calibration information is stored in the RAW (DNG) data, and it is referred to when stitching with RICOH THETA Stitcher.
That’s why we recommend sorting JPEG / TIFF files developed from Adobe Lightroom Classic in the same folder or a subfolder in the original directory.
Photo by Sam Rohn
360-degree content has been in high demand due to the global pandemic.
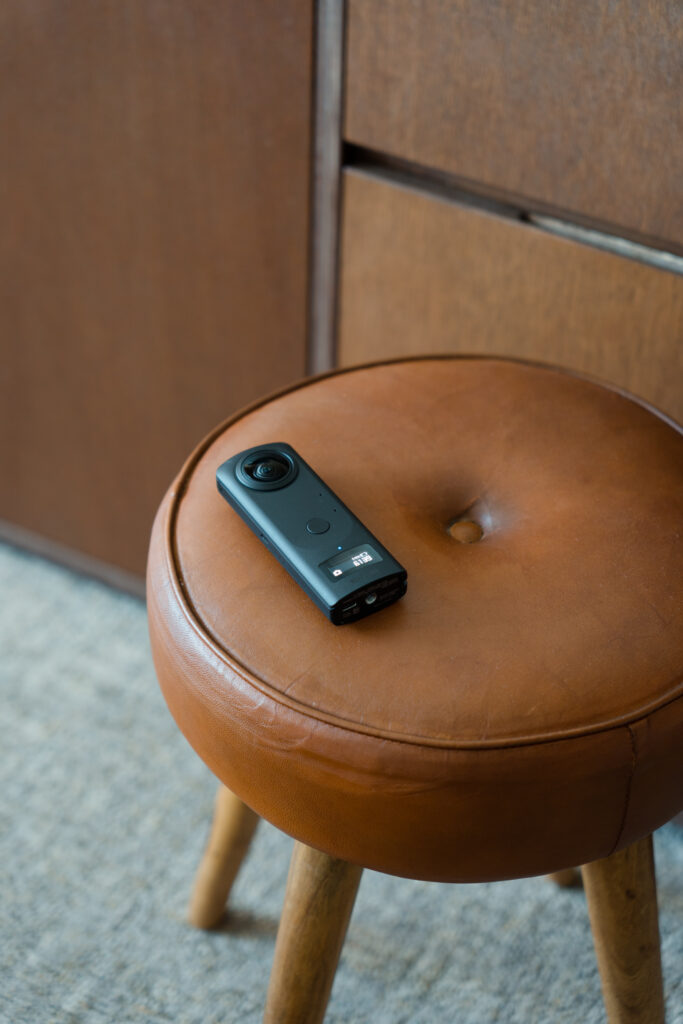
Try shooting and developing in RAW with THETA Z1 to make your spaces look attractive!


.jpg)


.svg)


