.jpg)
Here you can find recommended THETA shooting methods whether you like simple shooting or whether you are picky about shooting.
Which do you prefer??
Simple shooting
If you’re the type of person who doesn’t have or doesn’t like to spend a lot of time or energy to shoot while traveling, simply pressing the shutter button while holding the camera is probably best.
▼Shooting▼

▼Finished photo▼
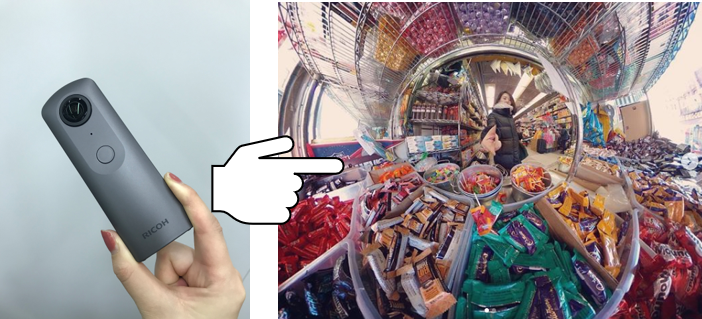
For photos of places you want to remember, simply press the camera shutter button to snap one image after another. You can rest easy knowing that everything is captured in the shots, so you don’t have to check them on the spot.
But if you’re worried about your finger ending up in the shot, there are two different ways you can use the self-timer mode to shoot! Click here for details on self-timer mode.
(1) Self-timer + direct placement
Activate the self-timer mode and set THETA directly on a table or the ground and press the shutter button.
▼Shooting▼

*Take extra care when placing THETA on unstable surfaces or in areas that are very windy, as it may fall over, damaging the lens.
▼Finished photo▼
This makes for natural photos in which the viewer doesn’t know where THETA has been placed.
Or . . .
(2) Self-timer + hold both sides
Set the self-timer mode and press the shutter button on THETA, then change your grip to hold it by both sides and strike a pose.
▼How to grip and finished photo▼
Remember that the area directly to the sides and directly below THETA are blind spots, and will not end up in the photo. Although it is not possible to completely keep your hand out of the shot, you can minimize how much of it is captured by changing your grip on THETA.
Picky about shooting
If you are picky about shooting, it is best to attach THETA to a monopod and shoot in the self-timer mode.
Simply attach THETA to a monopod and shoot with the self-timer to experience a wider range of shooting possibilities.

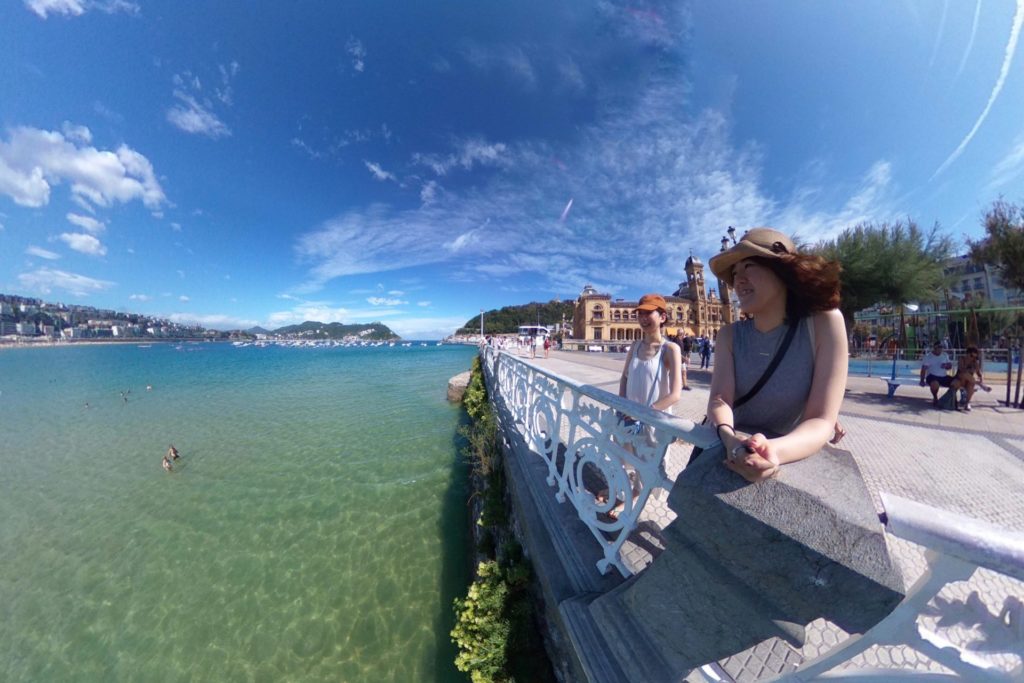
Natural wide-angle selfies
Activate the self-timer mode and press the shutter button. Just as shown in the photo below, grip the monopod with THETA attached to it, extend and hold it out in front of you and strike a pose.
▼Shooting▼

▼Finished photo▼
Simply extending and holding the monopod away from you results in a natural shot that captures you along with the scenery as if someone took the shot for you.
Shots from the back that look like someone took the shot for you
Activate the self-timer mode and press the shutter button. Next, simply rest the extended monopod with THETA attached on your shoulder as shown below.
▼Shooting▼

▼Finished photo▼

Doing this creates natural shots from the back.
Aerial selfies that look as if they were taken by a drone
Activate the self-timer mode and press the shutter button.
Hold the monopod with THETA attached and extend it as high as you can as shown below, then strike a pose for a photo that looks like an aerial shot taken by a drone.
▼Shooting▼

▼Finished photo▼

It’s almost as if someone snapped the shot for you from above.
Snapshots of your travels that could come in handy
1) Record of your lodgings
When a friend or family member asks about your trip, you could show them where you stayed. They’re sure to be excited when viewing 360-degree images of your lodgings.
2) Record of your travels between places
Although you may not have any exciting or interesting encounters while on the move, recording unexpected events and candid shots can make for a more natural way to remember your trip through photos.
Last but not least! The best method and time for transferring images for travel enthusiasts
Focus on shooting while traveling, then use the time when traveling between places, or when on the way home to transfer your images in one go. Because you’ll probably take a lot of shots, use the downtime when traveling between places or on the way home to connect to THETA and transfer everything in a batch! Click here for details on batch transferring.

Because the battery is drained more quickly during batch transfers that send a large amount of data, you may want to charge THETA with a power bank during transfers.
*Make sure to check the condition of your power bank ahead of time.
Recommended ways of editing, sharing, and storing images can be found in the next article.

Photos by @ryography, @saratodoelmundo


.svg)