Note: Support for the THETA+ app has ended in January 2023.
https://topics.theta360.com/en/news/2022-10-27/
Have you ever wanted to show other people an entire image even on SNS* that don’t support 360-images such as Instagram? Here, we will introduce two methods on how to make animation videos that rotate 360-degree images using the animation function available in the THETA+ app (iOS/Android).
1.Selecting a single movement from the initial setup movements (presets) to create a video
2.Selecting an angle or point you want to show and creating an animation video
*Social media that support 360-degree images are Facebook, YouTube and LINE.

Select the image you want to edit.

After the image is displayed, select the round button at the bottom of the screen to start editing.

1.Selecting a single movement from the initial setup movements (presets) to create a video
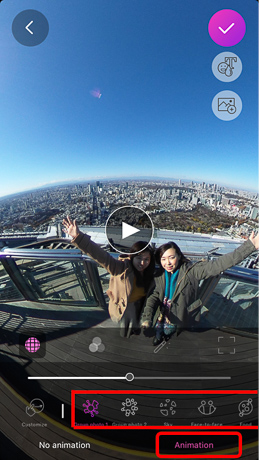
Select the animation tab at the bottom of the screen. Select a single movement appropriate to the image from among the eight presets (Group Photo 1 & 2, Sky, Face, Food, Nature, Building, Nightview, Flower Garden) shown in the red frame. This allows you to easily edit the animation movement.

2.Selecting an angle or point you want to show and creating an animation video
Select the animation tab at the bottom of the screen. Select “Custom” from the menu that is displayed.

Select a view from among the choices of “Mirror Ball”, “Little Planet” and “Straight”.

Rotate and scale the image to set it to the angle of view you want to show at the start and then select “+” (capture button) at the bottom right.

Similarly, rotate and scale the image to set it to the next position to be shown and then select “+” (capture button).
If there are any other positions you want to show, repeat the same procedure to select them.


Selecting the “→” icon allows you to adjust the movement between each viewpoint (travel direction, speed, easing (rotational pace) and the stop time). Select “Done” at the top right after making each setting.

After all viewpoints and movements have been set, select the “Done” button at the top right to return to the main menu.
Once all other editing tasks are complete, select the check mark at the top right to export the animation and complete sharing.